The Technique of Kappazuri
About Kappaban
“Kappa” of “Kappazuri” (literally means “raincoat printing”) is from Portuguese word “capa,” cape or robe in English. It means a tailored overcoat usually made by woolen cloth, cotton or oilpaper to be put on clothes on rainy days.
In Japan, the word of “Kappaban” (literally means “raincoat print”) has been used since 1746. There is a special paper called “Kappagami” (literally means “raincoat paper”) that is made from laminated sheets of handmade paper glued with persimmon tannin. It is very strong, flexible and water proof. Kappazuri is a technique frequently used in “Honesenzuri” (literally means “skeleton print”), i.e., drawing a picture on Kappagami and finishing with hand-printed contour line using ink.
(Note) Kappaban is hand-print. Because Kappagami is coated with persimmon tannin (Kakishibu), it is generally called “Shibugami” in Japanese dyeing.
Considering the technique of Yoshitoshi Mori, it can be said as a combination of Kappazuri and stencil dyeing. His technique is sometimes explained as “Stencil Print” in English; however, this word is not enough to express whole of his technique as it includes not only the process of printing but also that of dyeing such as Noribuse (reserve printing process). The feature of his technique is the mixed media of Kappazuri and stencil dyeing.
Major Techniques of Printmaking
Major techniques of printmaking are as follows:
- Relief Print
- The oldest technique of printing represented by woodblock print.
- Intaglio printing
- To incise the surface of copper, zinc or linoleum with needle or engraving knife, and put ink in incised line or sunken area, and print.
- Lithography
- It is a technique based on the principle that oil repels water. The typical one is lithograph. After an image is drawn with oily ink, pencil, chalk or crayon on the surface of a smooth limestone plate, the stone is treated with talc powder, then a mixture of acid and gum arabic. The surface of the stone is changed, and ink can be applied only on the drawn part, and the portions of the stone which is not protected by the grease-based image absorbs water and repels ink. Recently, large-sized artwork is made using zinc plate or aluminum plate instead of limestone.
- Stencil
- It is a technique to cut out paper, and apply pigment through that cut-out holes.
Other than them, there is a technique of mimeograph called serigraph, silkscreen printing, etc. It is developed from the traditional mimeograph technique, and frequently used for the production of commercial posters or order arts.
As you can see, technique of Yoshitoshi Mori can be classified into the last one; Stencil.
Yoshitoshi Mori: The Printing Process
Draft sketch
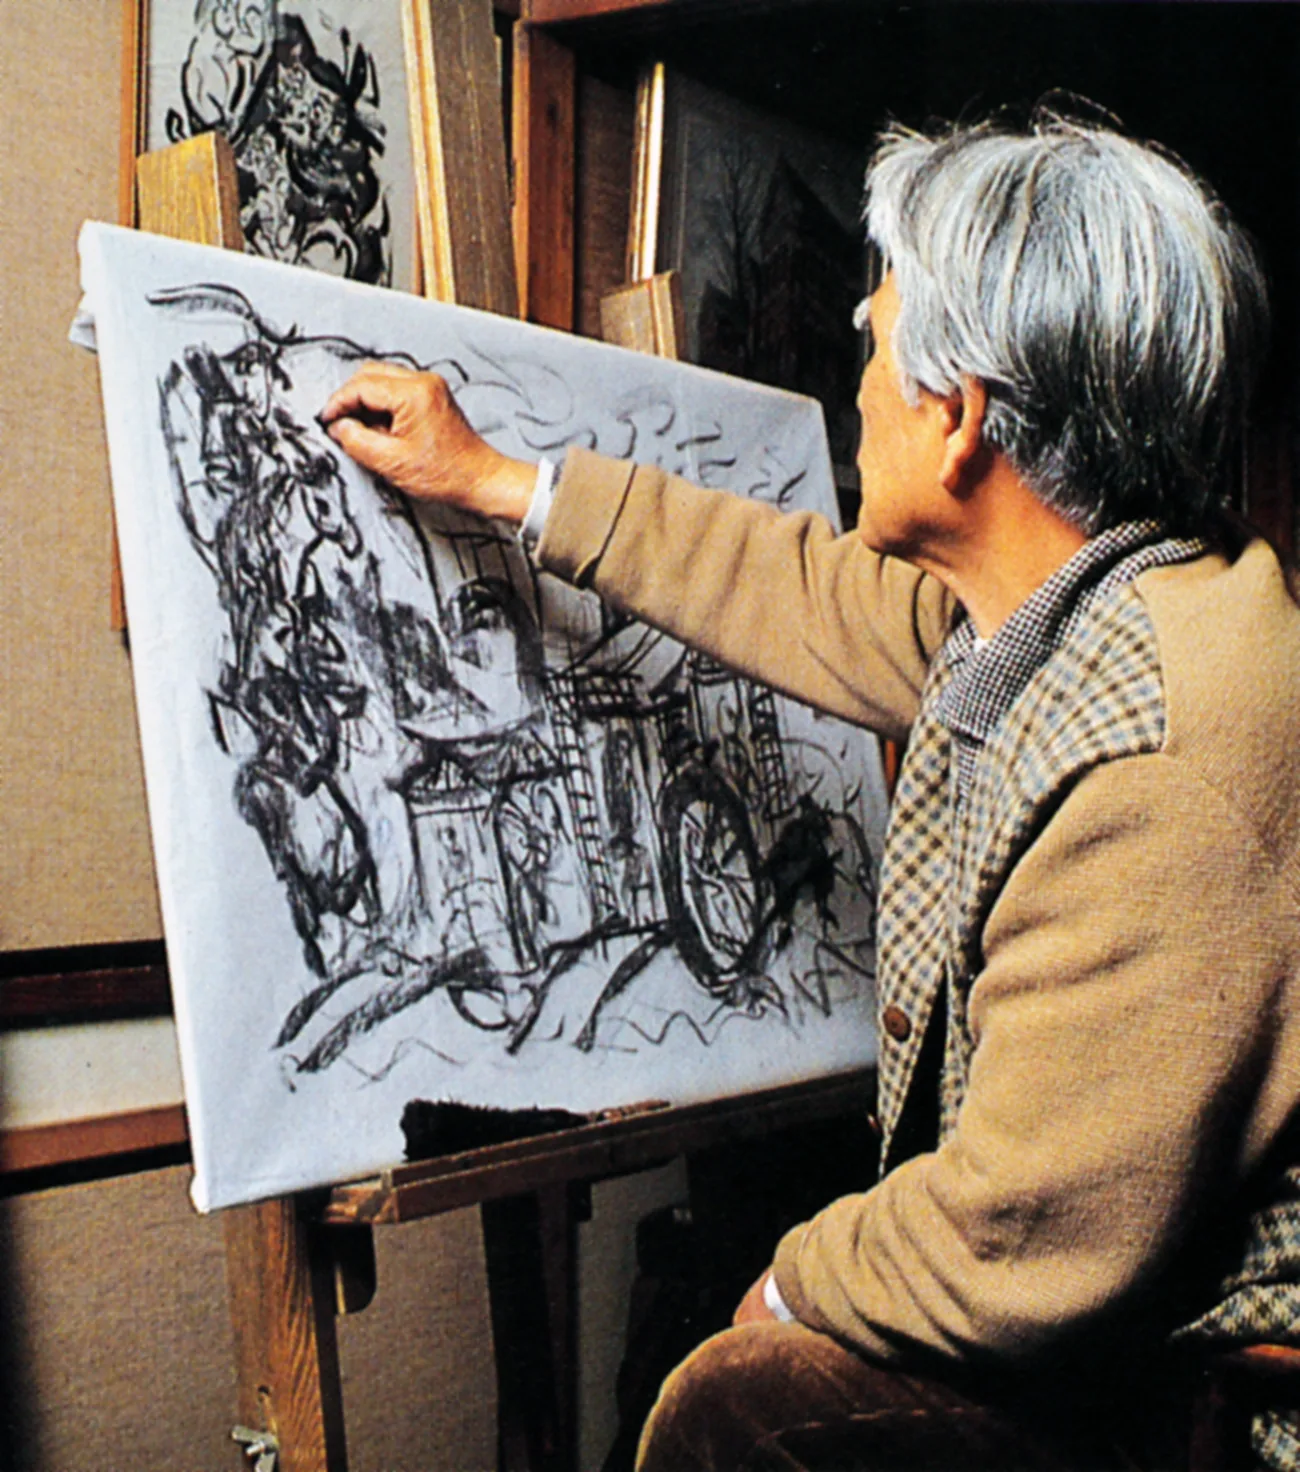
Yoshitoshi Mori was born to be an artist, and always carried his pencil and sketchbook. He was a well-prepared and concentrated person; for example, when he worked on the Tale of the Heike, he referred to the TV drama, “Heike Monogatari (the Tale of the Heike),” and before watching TV, he read the book, “the Tale of the Heike” so that he could get the image systematically. During watching TV, he made a lot of sketches at a giddy speed grabbing impressive scenes immediately. In his brain, positions of people, stage settings, stage properties, stage background, etc. were assembled with historical research, and a number of rough sketches were produced on paper.
One selected from those rough sketches is developed into a draft, and its arrangement is phantasmagoric; some are strong and with bold form, and some are delicate and fine; some are colorful and some are monochrome. His world is really protean.
-
Step 1Attach the completed drawing to stencil paper (shibugami) with thin adhesive.
Making of stencil
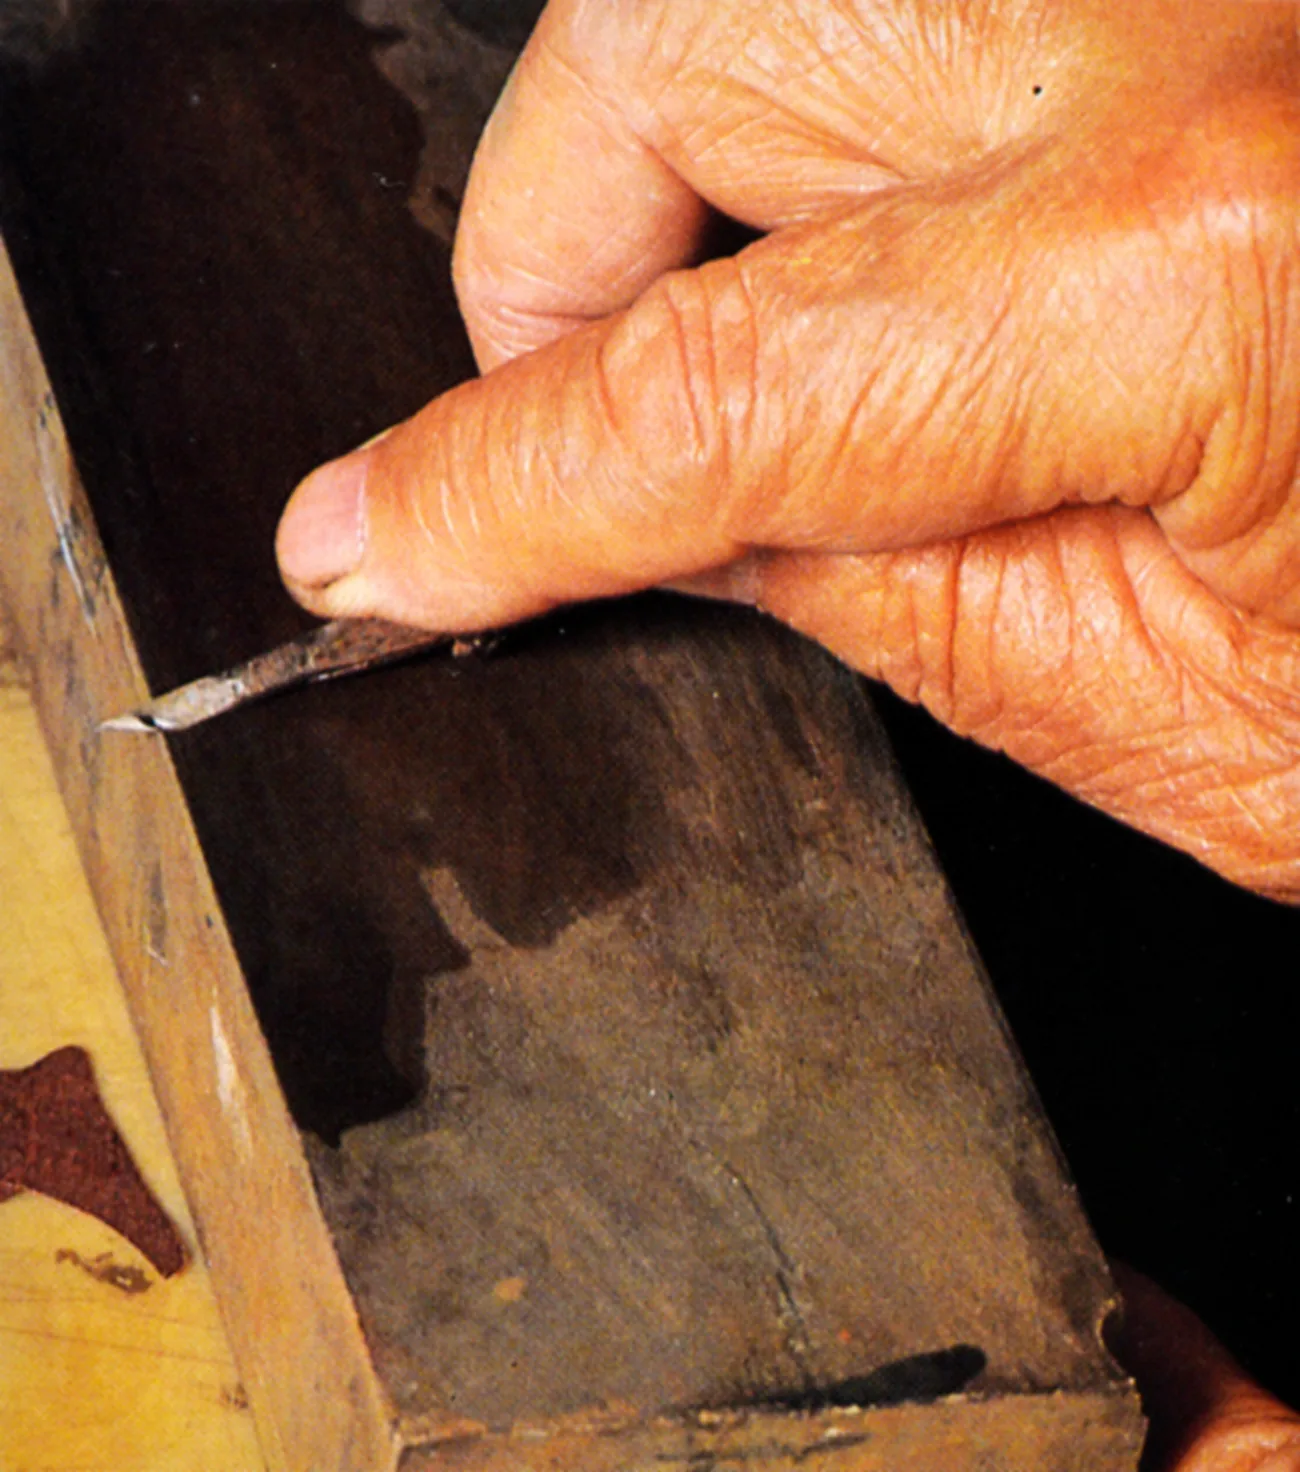
After patterning or formalization of draft by his own method with high-density and simplified form, a stencil is made. First, the completed draft is attached on stencil paper, Shibugami, by beeswax, then carved with a small stencil knife.
It depends on the number of colors how many stencils are necessary. When the stencil is completed, Kanreisha (Victoria lawn) is put on it with japan lacquer. In most cases, he designed the draft as all the lines are connected; however, in some cases, some fine lines are disconnected, and may come apart. To prevent it, Victoria lawn is used. Victoria lawn is thin and loose-woven fabric, and reinforces the stencil and makes it easy to treat.
-
Step 2Sharpen the tip of the stencil knife to be used for cutting the stencils. -
Step 3Cut the drawing so that all the patterns are held together by bridges. Cut out the key impression stencil (omogata) and the color stencils. -
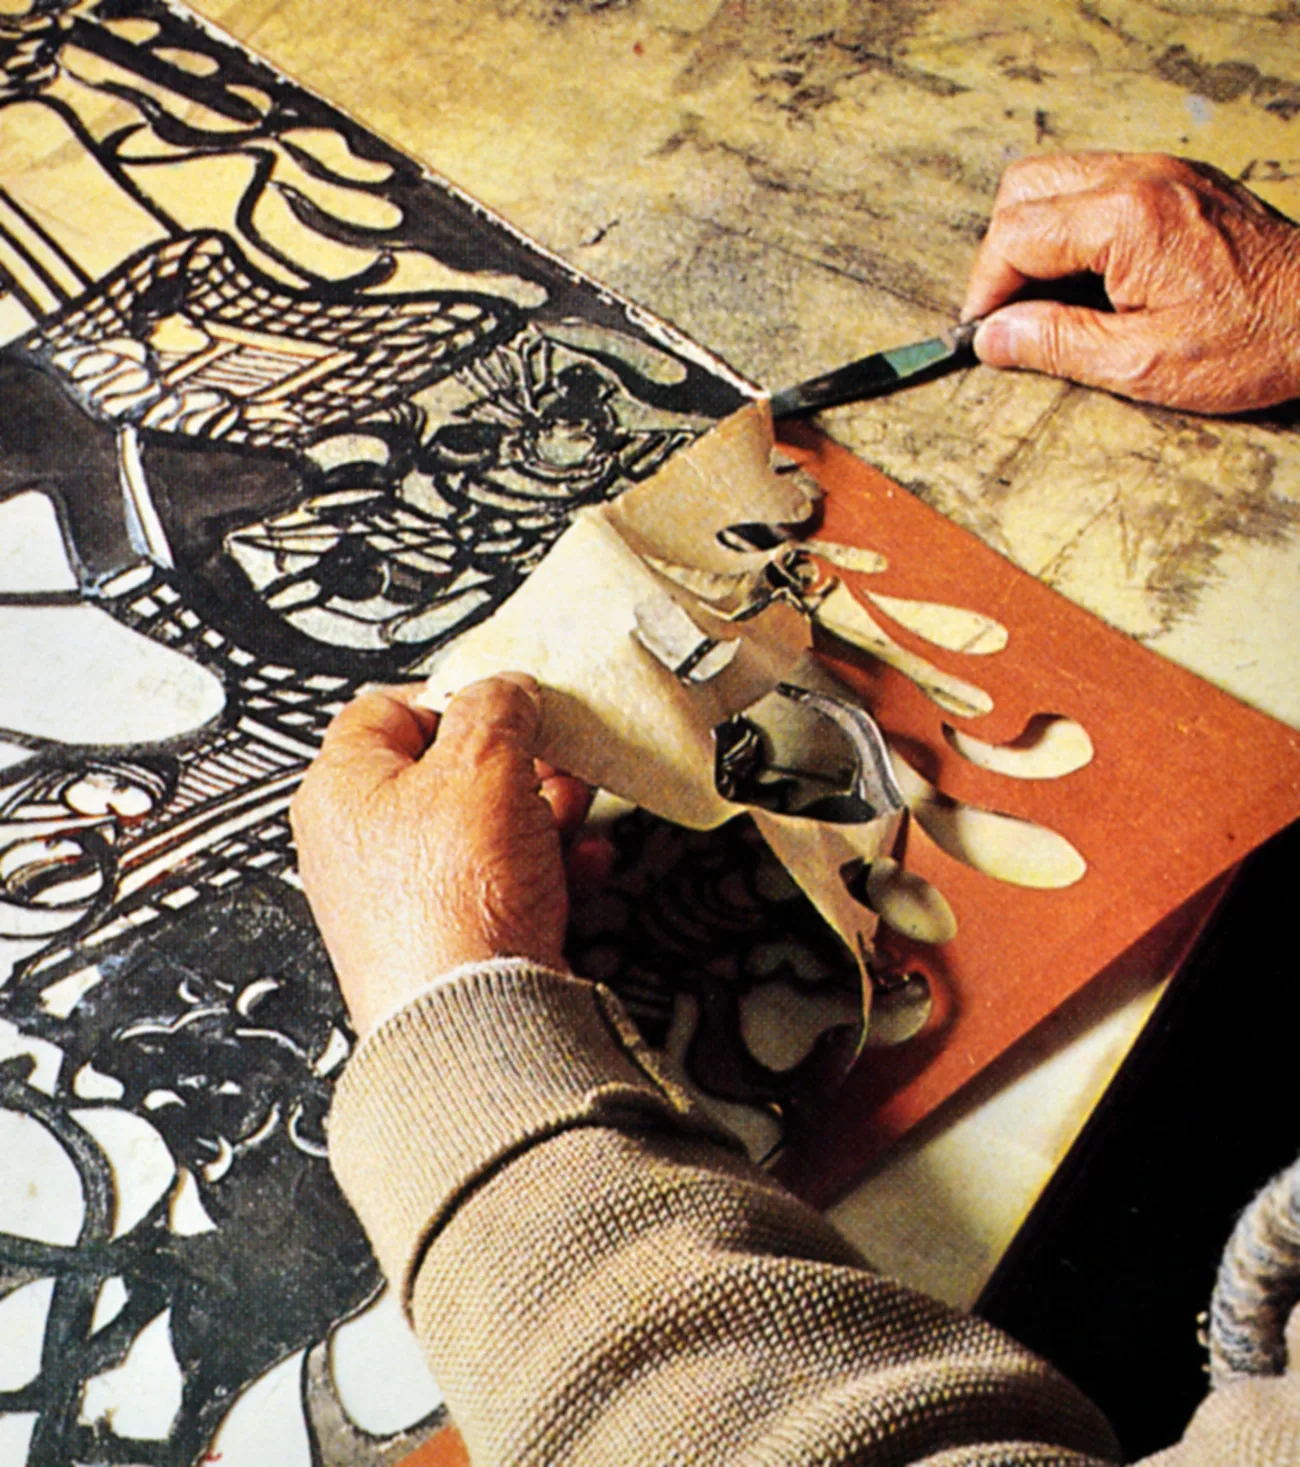
Step 4Remove the drawing from stencils. -
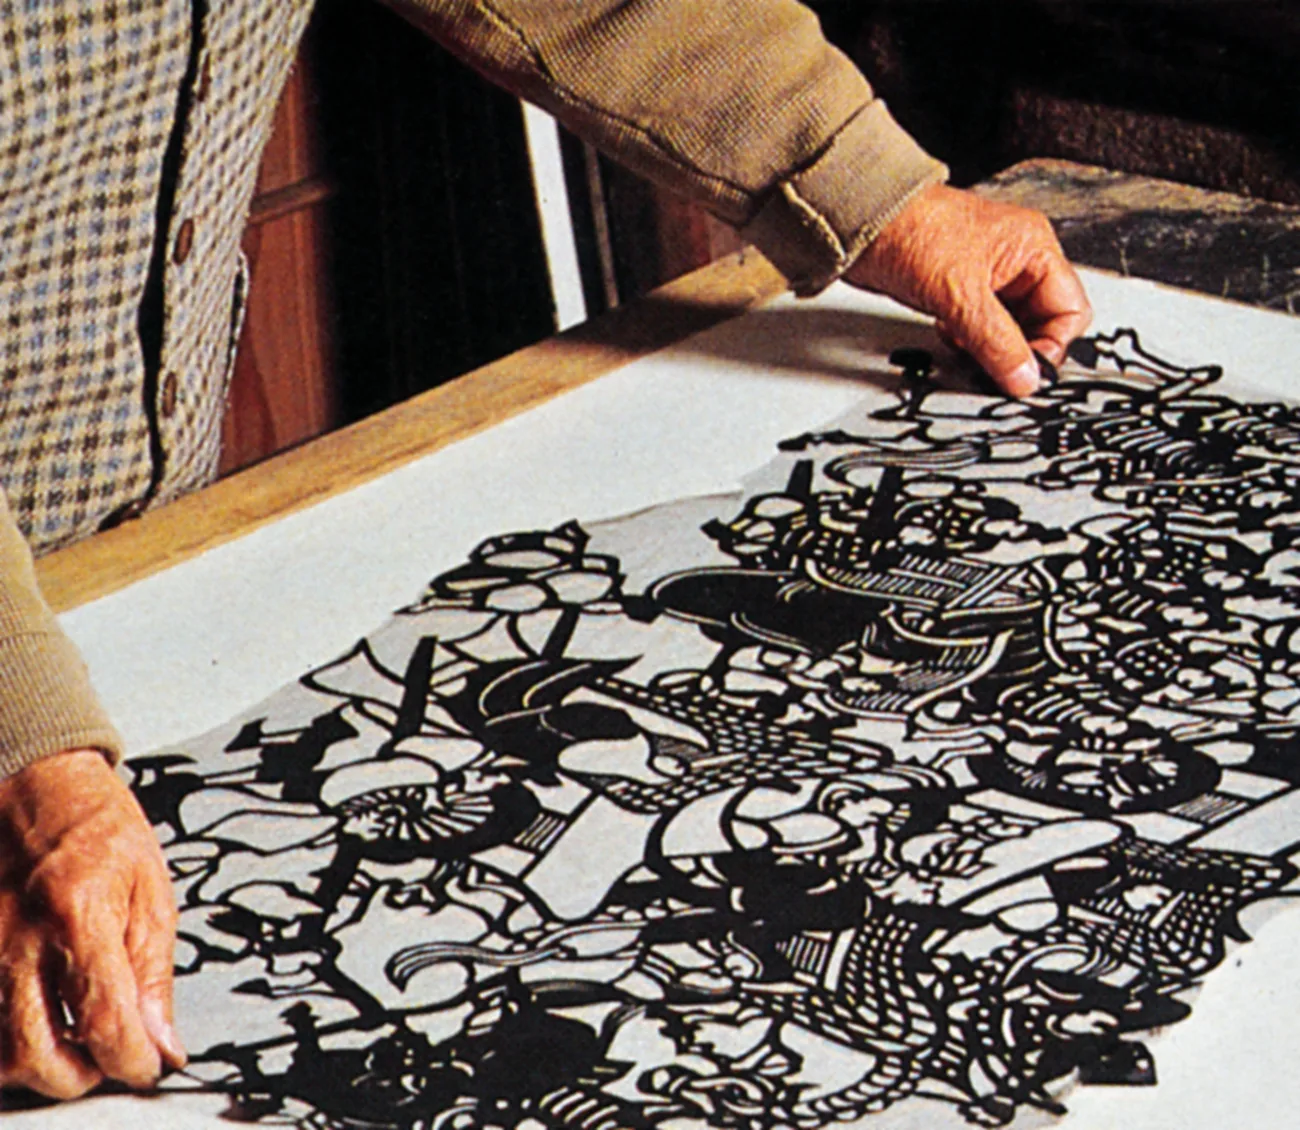
Step 5Place stencils, reinforced with silk gauze for thin lines, on paper.
Production of artwork
A stencil reinforced by Victoria lawn is immersed in water for about 10 minutes. When a stencil is wet and becomes flexible, excess water is wiped off.
A stencil is put on Japanese paper (printing paper), and dye-resist starch is brushed on the outside area of the stencil. This process can reserve the original color of Japanese paper around the stencil. It is called “Bosen-no-norioki.” Then, the stencil is removed, and after starch is completely dried, color printing is started using stencils. In this process, one or more stencils are necessary according to the design and number of colors.
Various pigments are used for coloring. Sometimes, he applied some plant dye over pigment to get special effect including moisture feeling. It is his unique technique, and no one can imitate it.
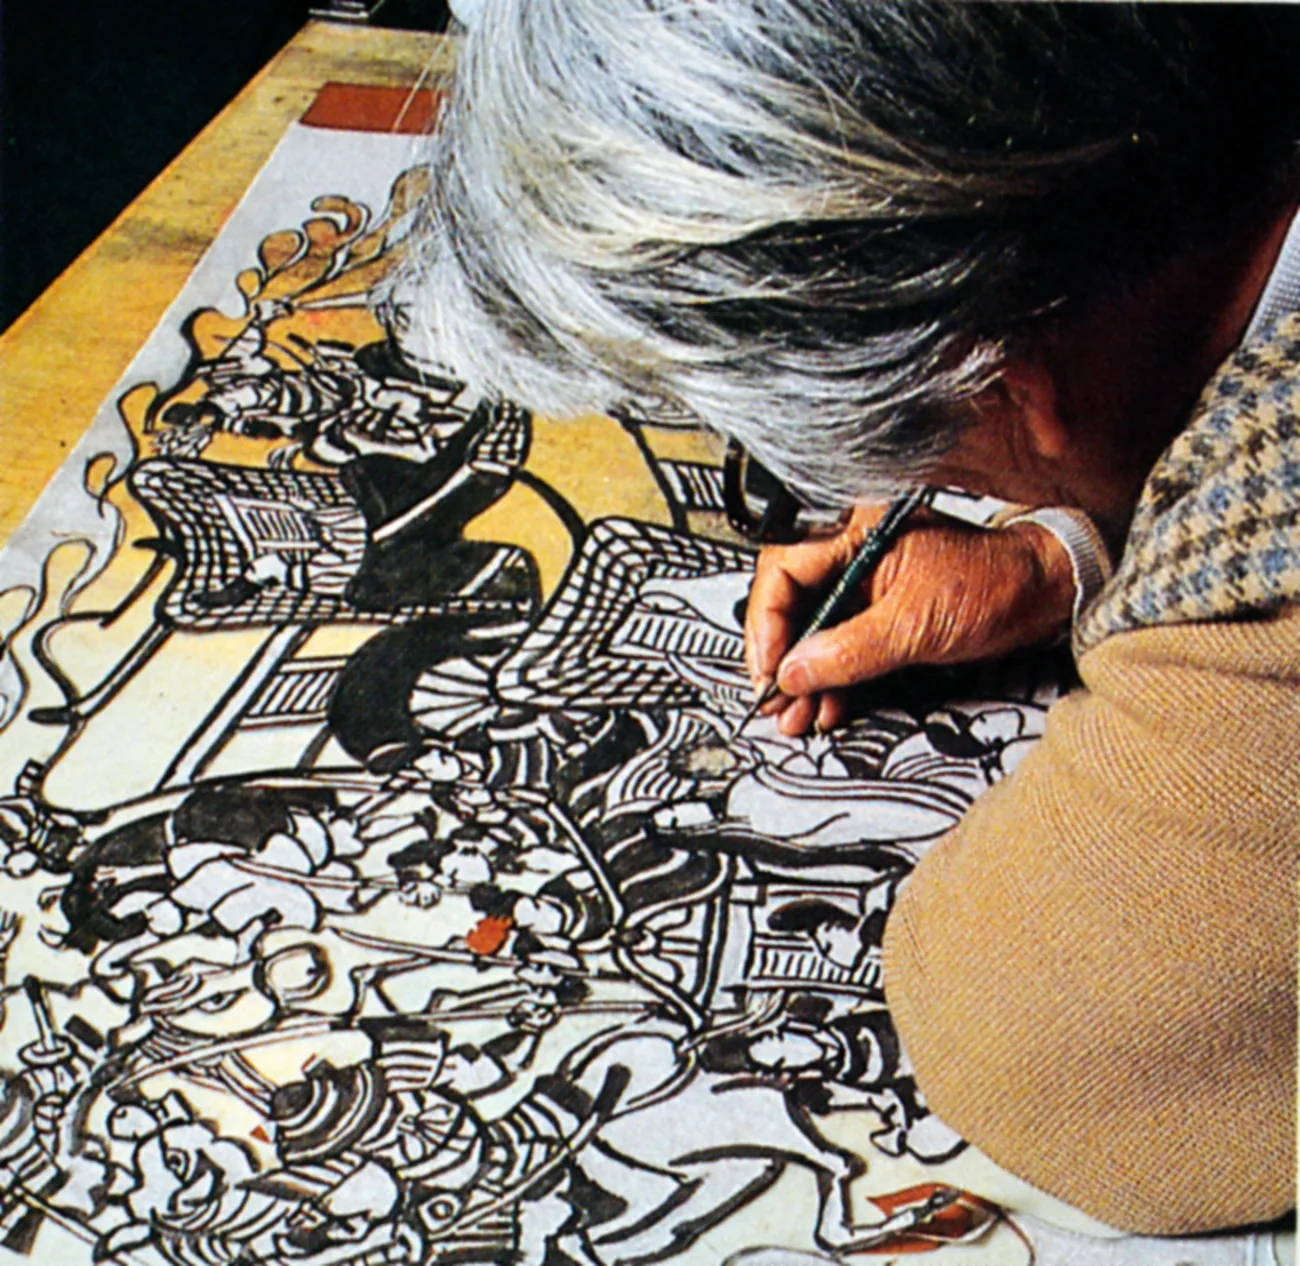
After color printing is finishing process called “Honesenzuri.” Prior to the finishing, the stencil is put on color-printed paper, and entire print is covered with dye-resist starch. Then, the stencil is removed, and after the starch is dried out, everything is blackened with ink. This final process is called “Omogata.”
When the ink is dried, dye-resist paste is washed off, and this process is called “Mizumoto.” Washed paper is put on a board to dry, and this process is called “Mizubari.” Finally, it is signed, numbered and completed.
As shown above, the process of “draft sketch→stencil→Bosen-no-norioki→color-printing→Kumadori (gradation)→Honesenzuri→Mizumoto” is nothing but a technique of stencil dyeing. Yoshitoshi Mori sometimes skipped Bosen-no-norioki, and put stencil on paper directly for color printing. It is called direct Kappazuri, and he often mixed up both techniques in one masterpiece. He used the combination of both techniques.
His career for more than 60 years created the unique tincture that is deeply connected with the bloodline of Japanese. It can be said that Japanese traditional world is developed on his masterpieces.
-
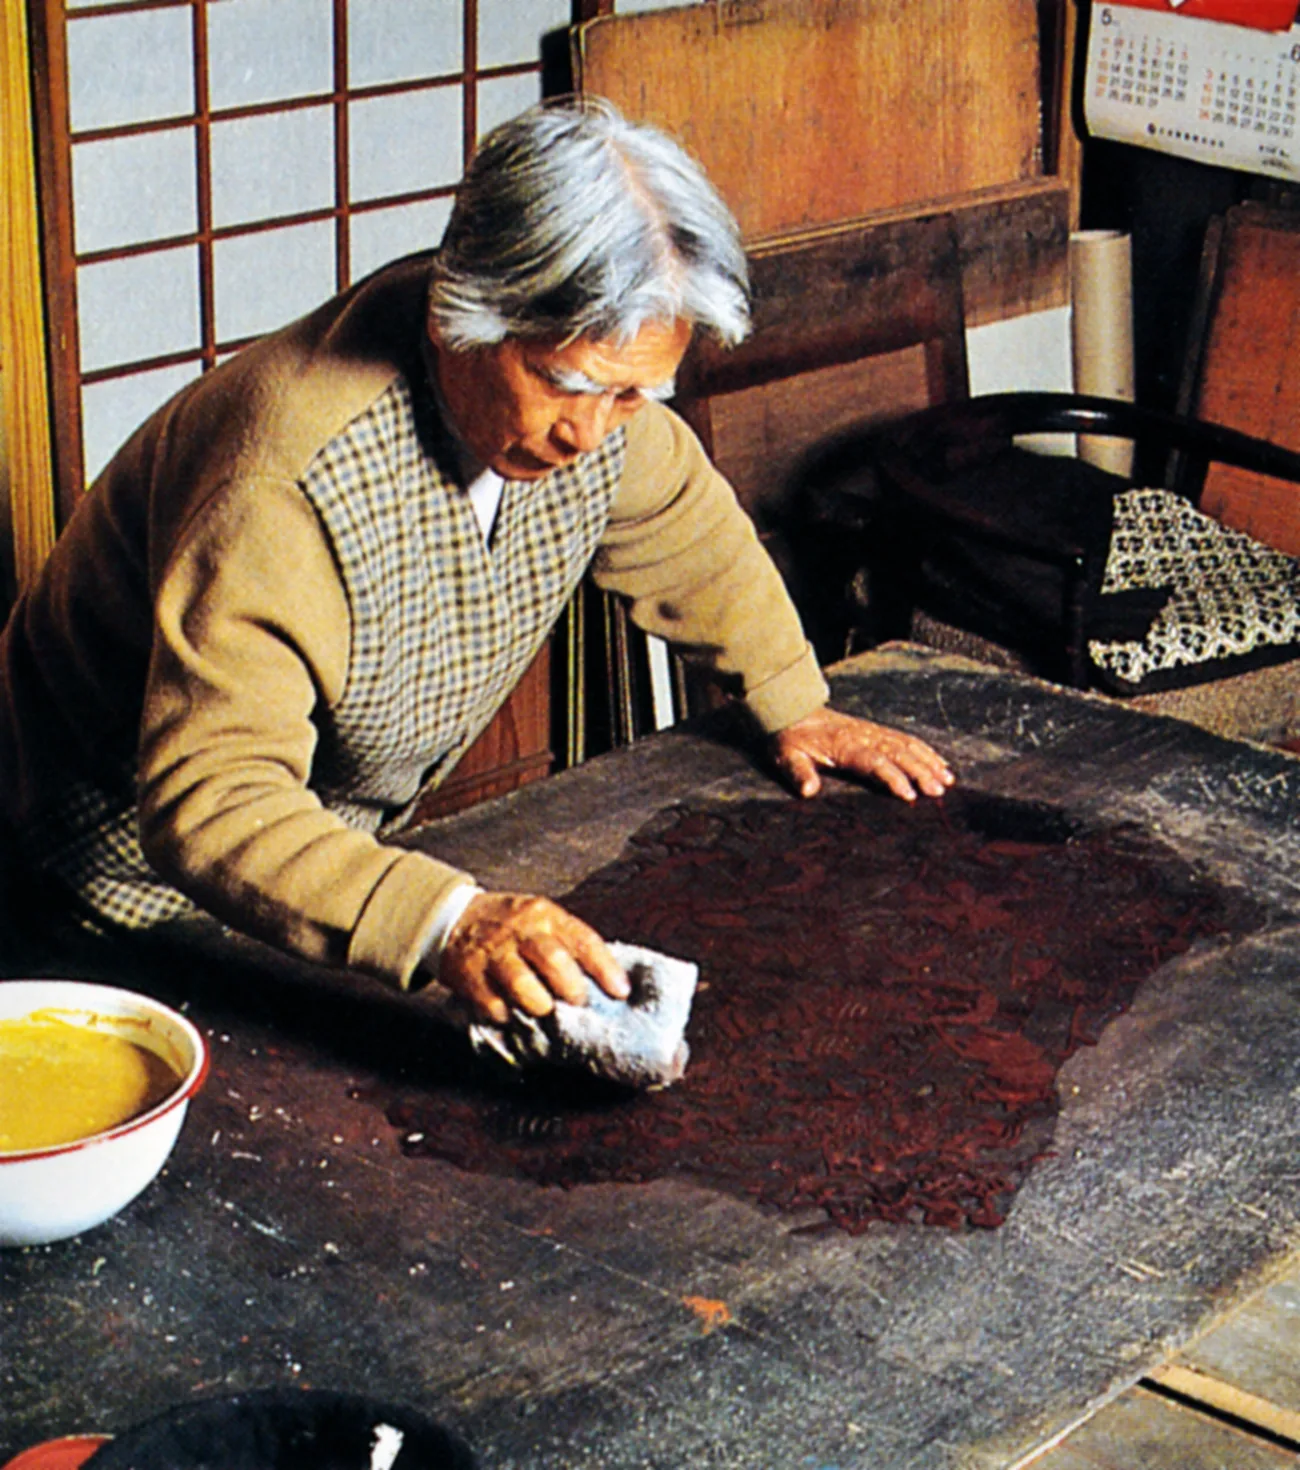
Step 6Wet stencils to make them flexible. Wipe off excess water. -
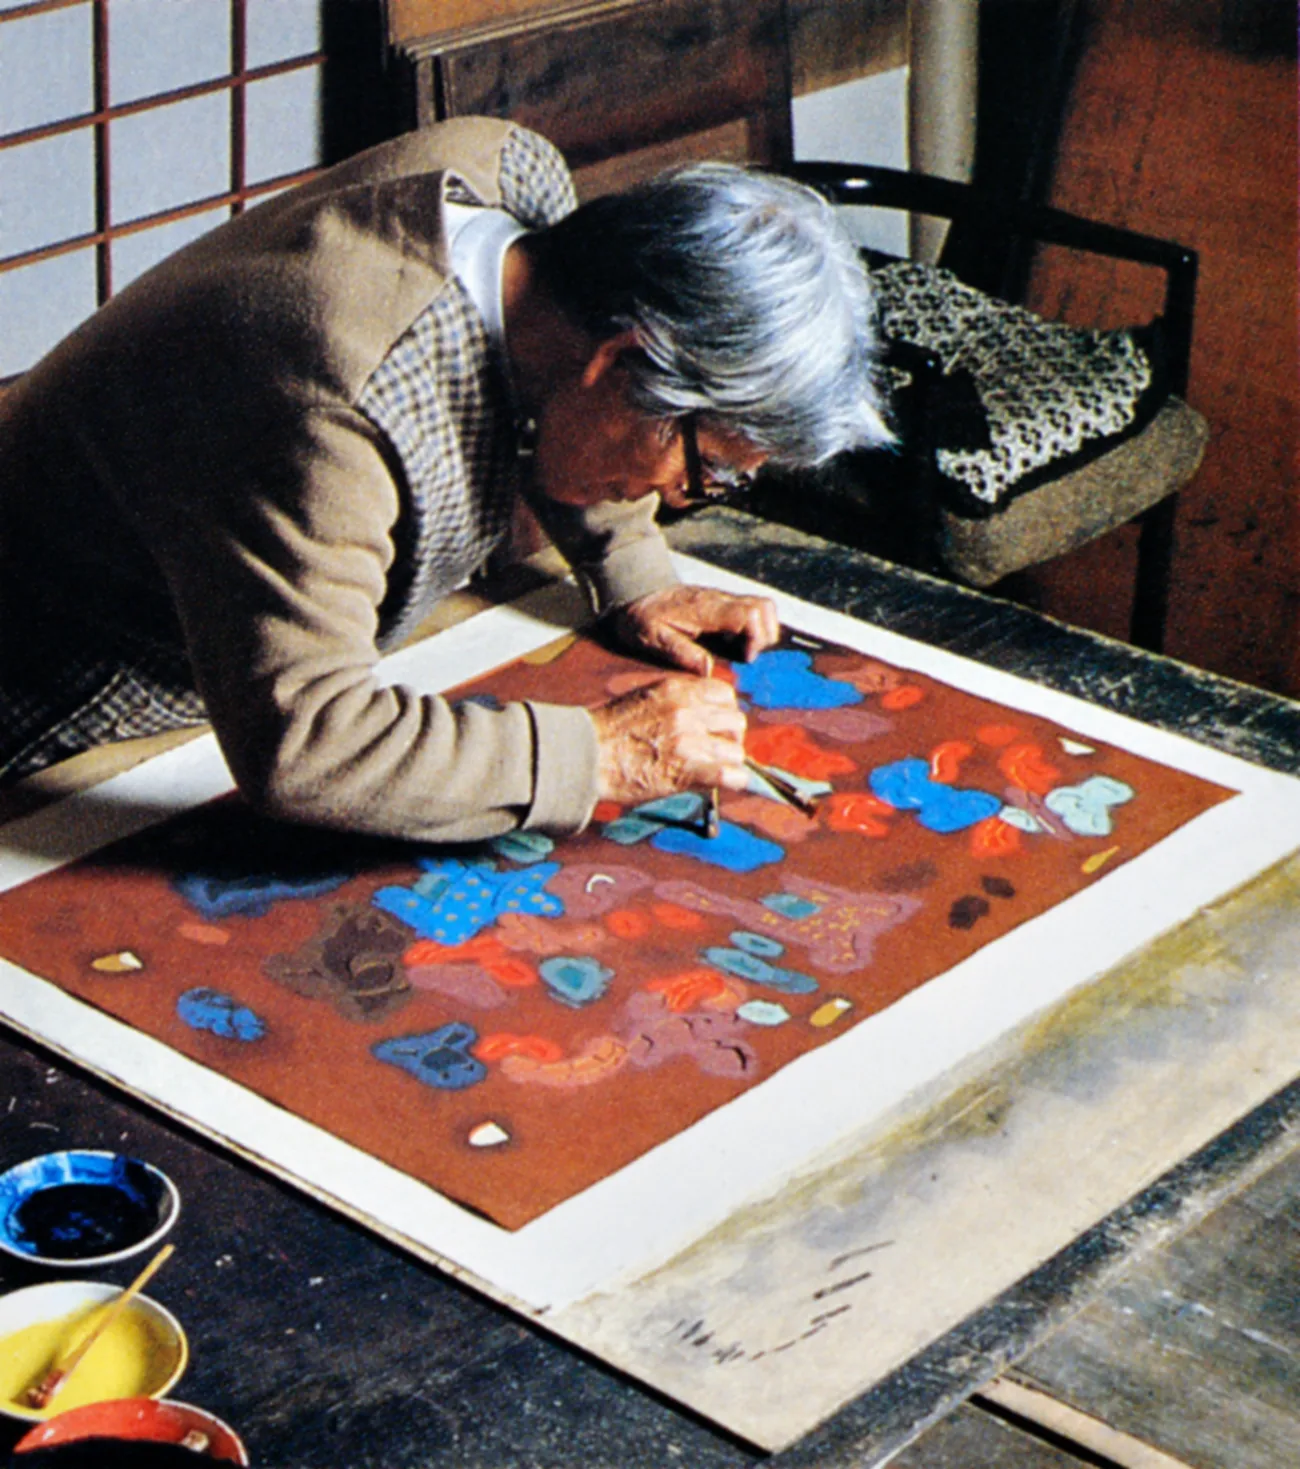
Step 7Brush on colors over stencils. -
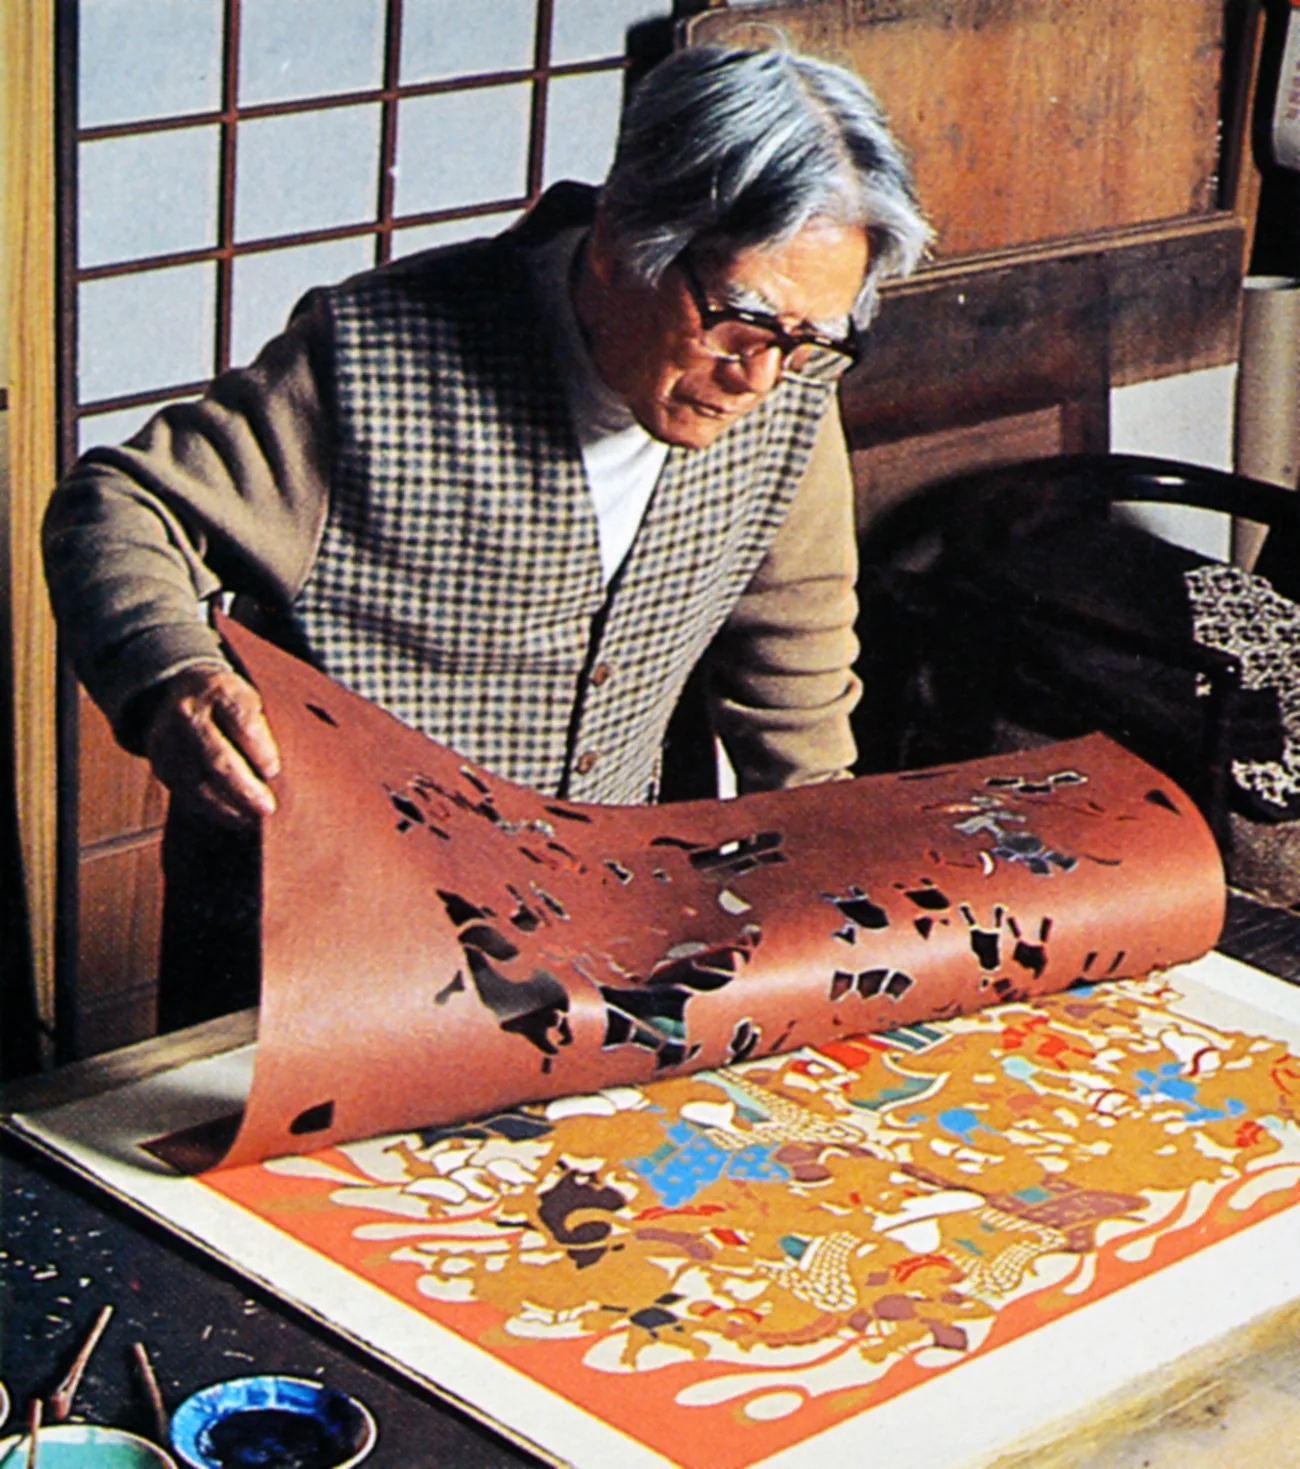
Step 8Check color printing. -
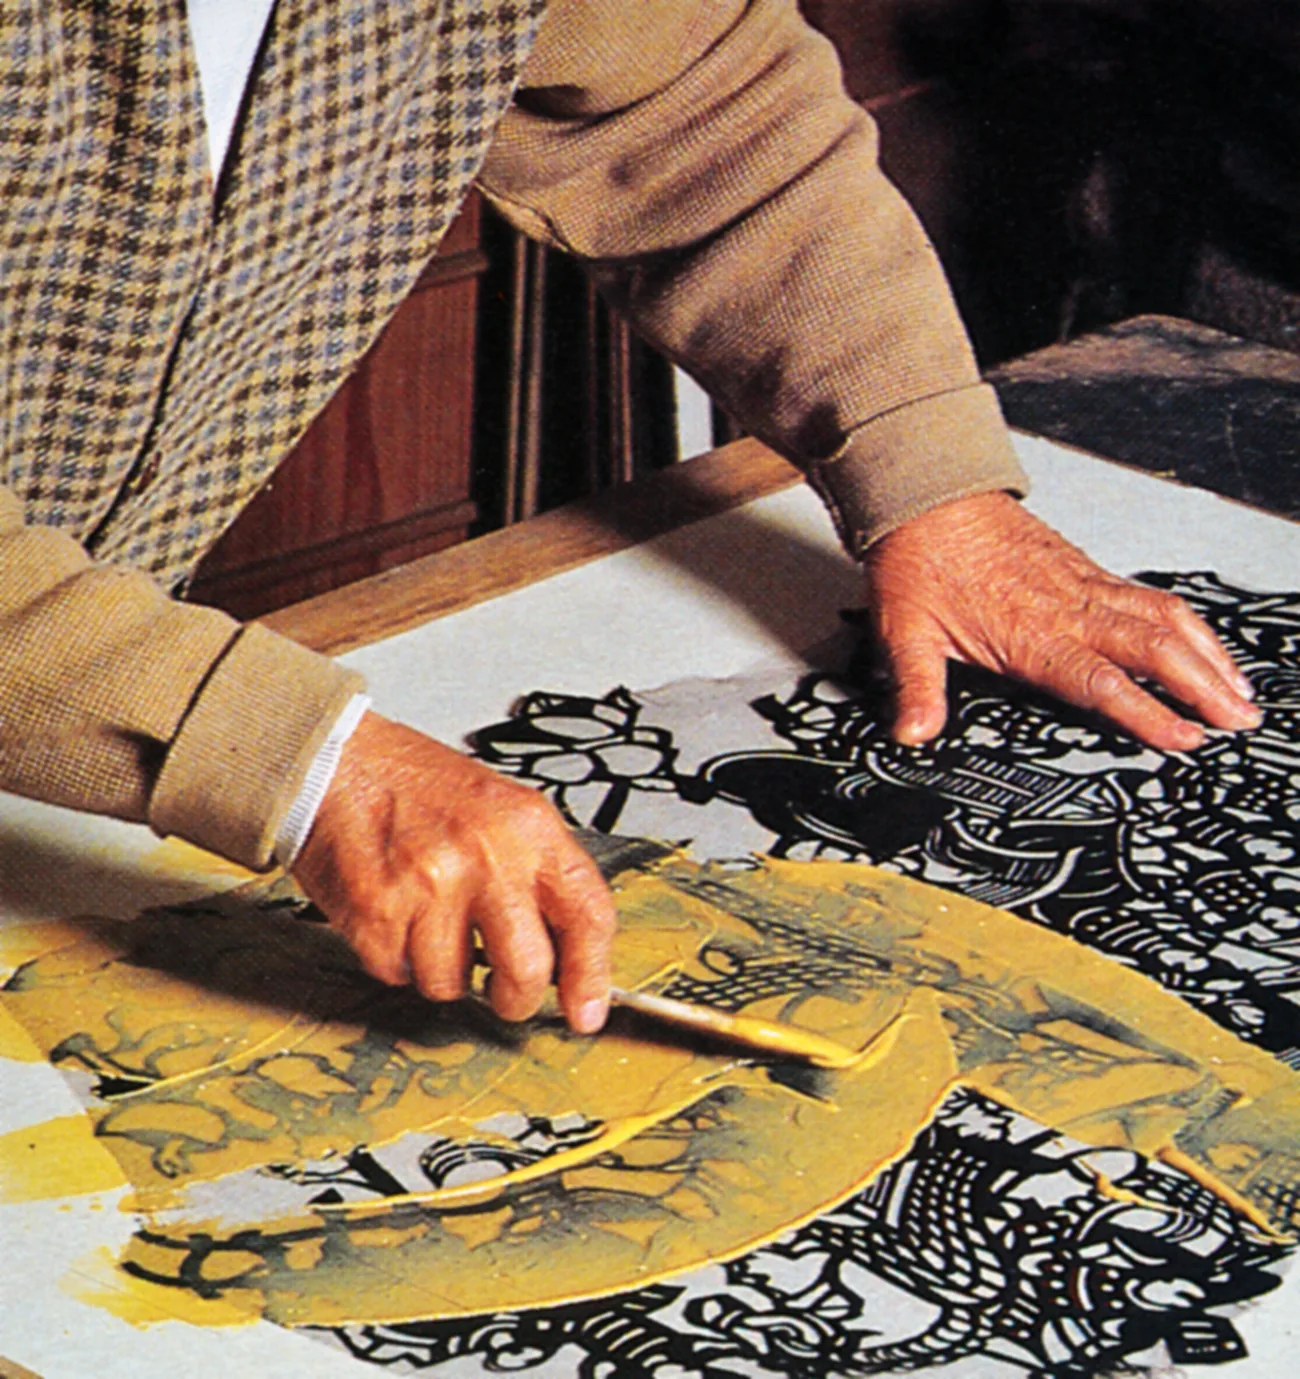
Step 9Brush on dye-resist paste to white, unprinted parts of design. -
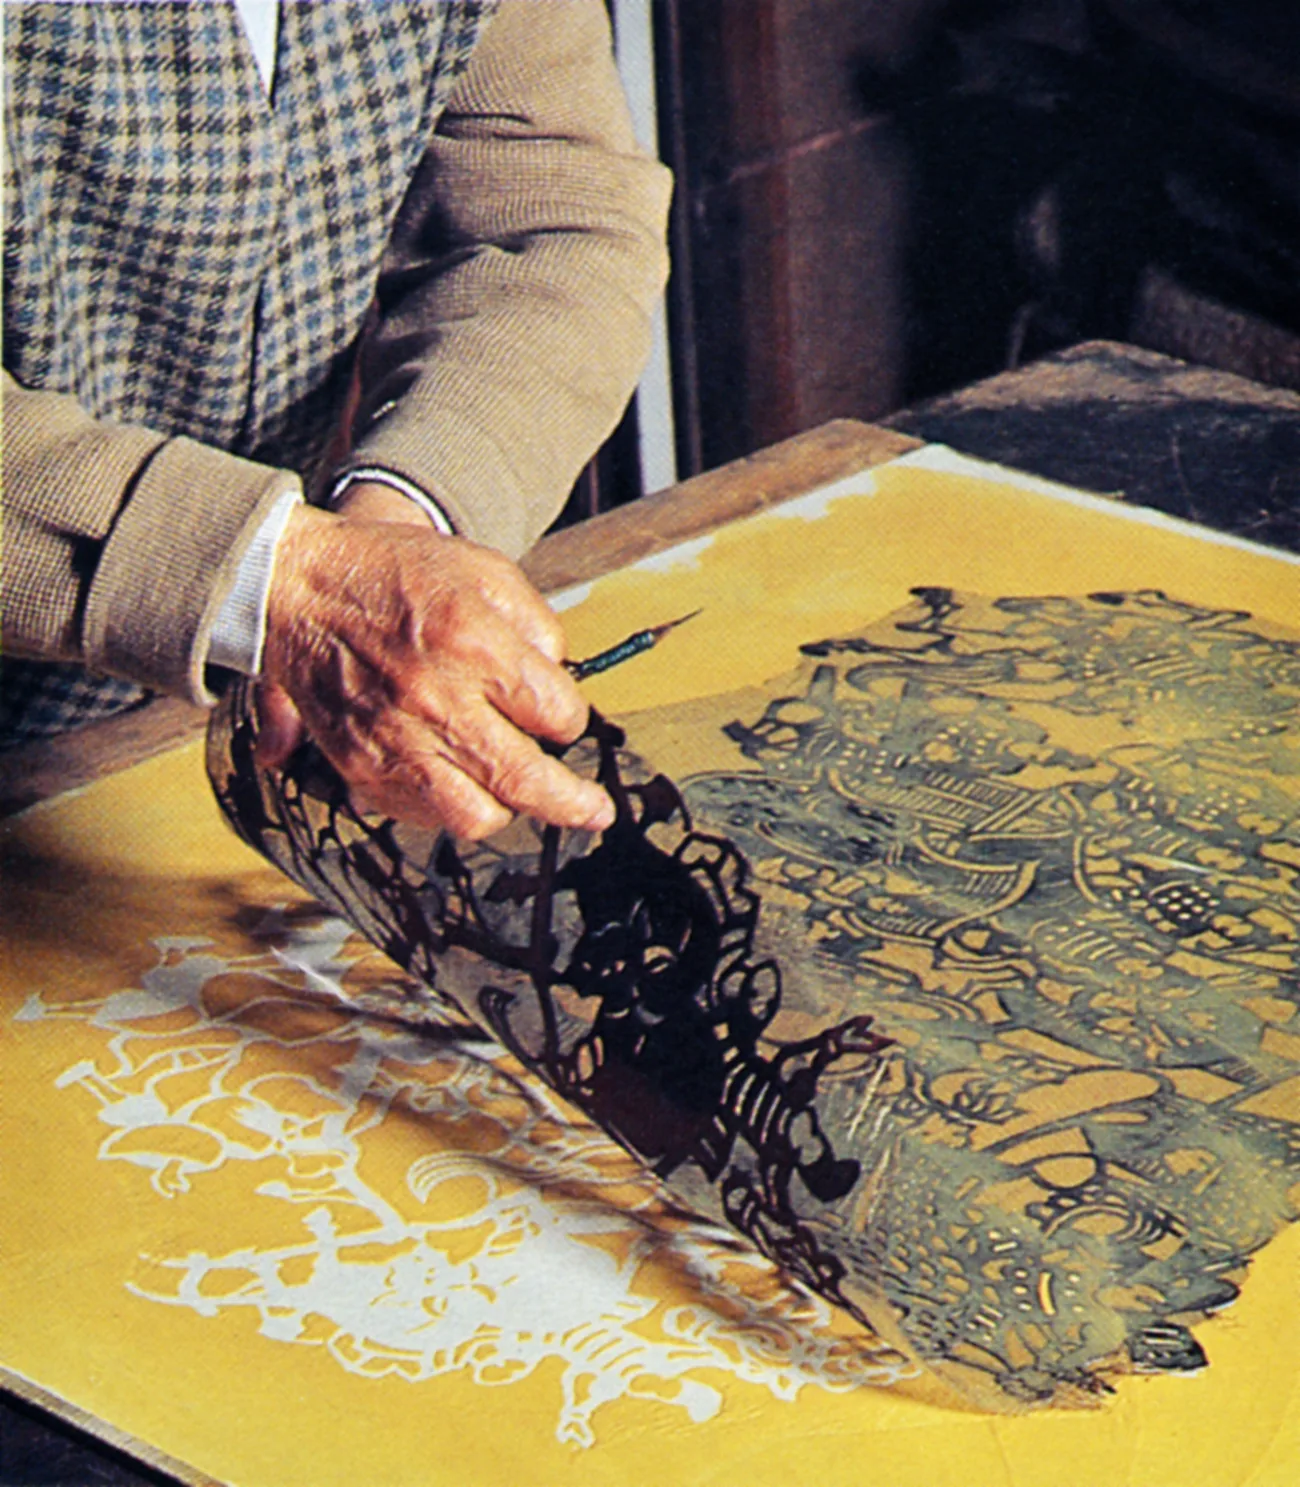
Step 10Let dye-resist paste dry completely and remove stencil. -
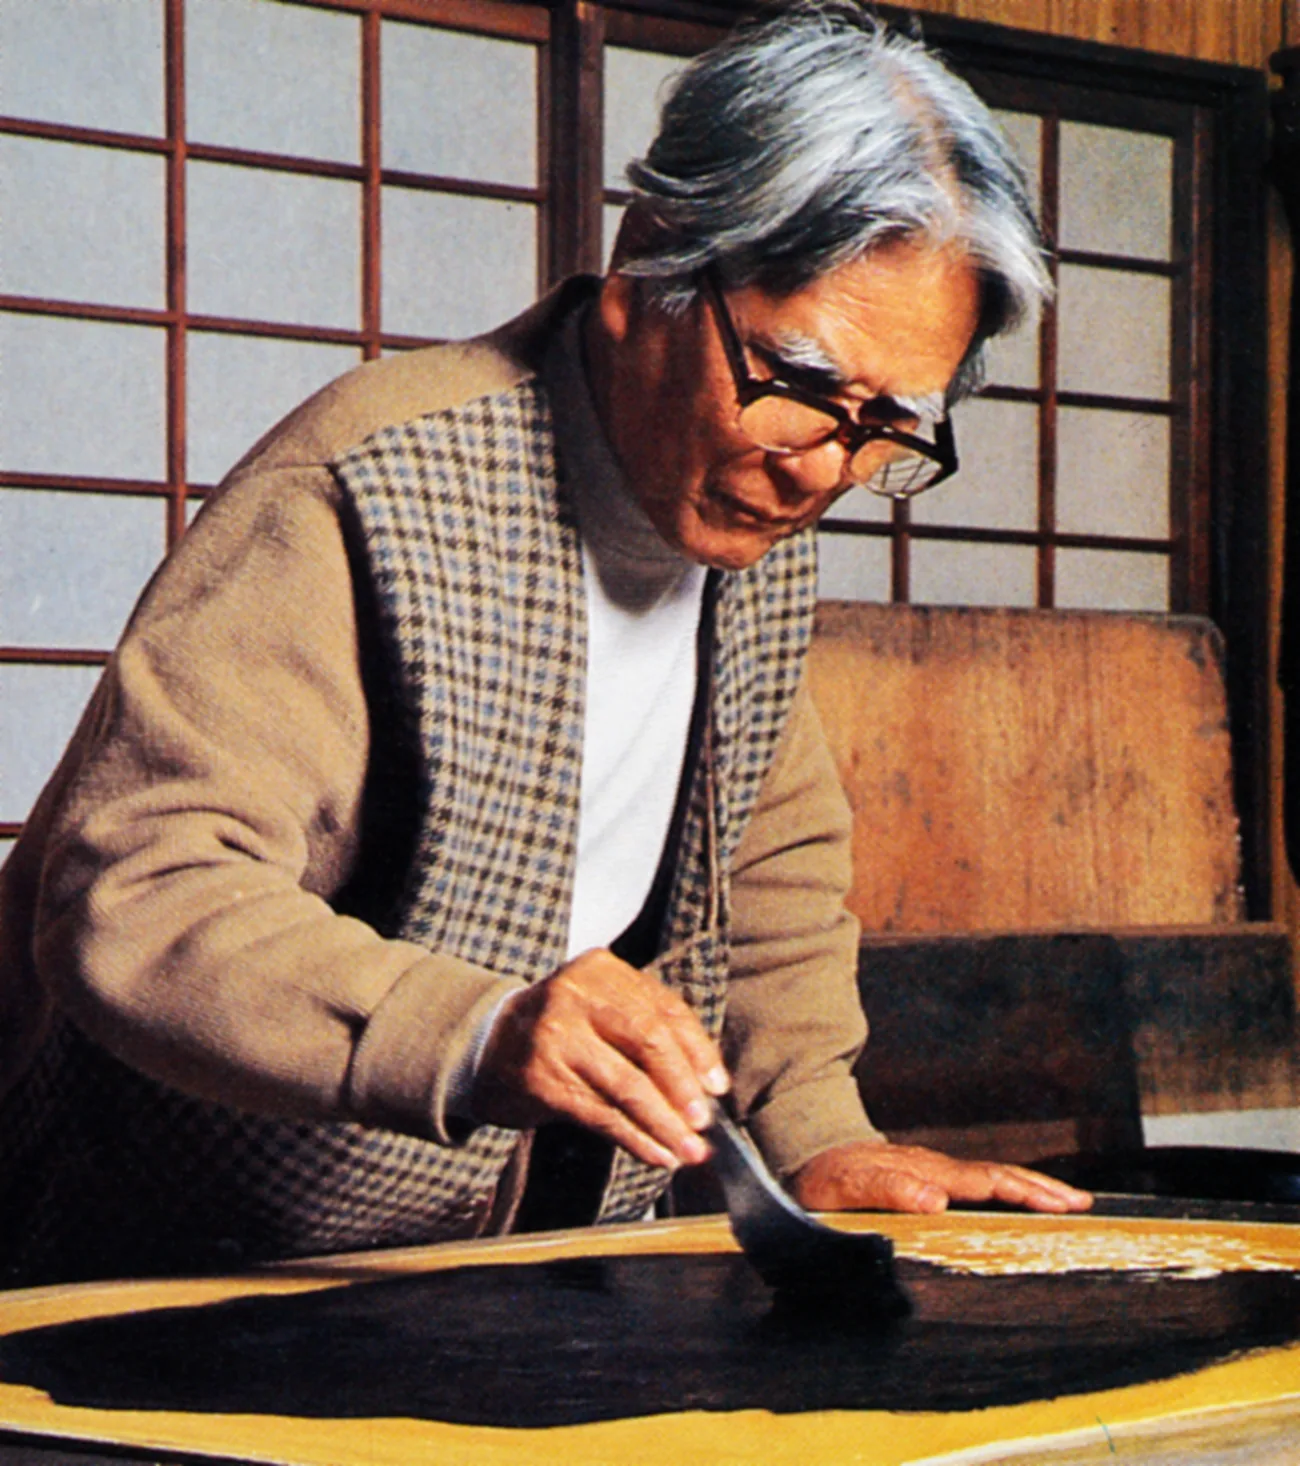
Step 11Print key impression stencil with India ink. Step 12Wash off dye-resist paste.
Step 13Dry the printed wet paper on a wooden board.
Step 14Check the finish. Handcolor any unfinished areas.
Step 15Sign and stamp the print.
What is dye-resist starch (Bosen-nori)?
Basically, it is made from sticky rice. Sticky rice is ground by millstone until it becomes fine powder. Then, it is mixed with rice bran and hot water, and kneaded well. After shaping it as small dumplings or donut, it is steamed, and then kneaded in a bowl with pestle.
To make dye-resist starch, lime is mixed in it. Lime has an effect to make dye-resist starch to be sharp and easy to be fixed.
Today dye-resist starch is manufactured, and you can buy it. So you don’t need to make it by yourself.